Friday, January 30, 2009

Well the little buggers are growing like crazy. The only one that isn't cooperating is the peppers. I've done some reading online through other blogs and forums and it sounds like peppers are tricky. They have to be the darker colored ones to germinate, green peppers are picked early, so the seeds from my green pepper may not grow. Also they seem to take a lot longer to germinate than the other seeds. So I guess I won't give up on them yet. I did put a few more of the seeds into a paper towel that was damp to try and persuade them to start. Hopefully between these techniques something will give way. I've also been putting the pot on a heating pad in the evening when I'm around the house, trying to get some more warmth into the pot. I keep the apartment at 68 so hopefully that isn't too cool for the plants.

Since these have sprouted up I noticed the tomatoes stretching for light, which I guess isn't good, so I've been placing them in the window sill until I can get lights set up for them. I did buy a couple cfl's (compact flourescent) the other night at Lowes, one is labeled a grow light and the others are just in the standard section but are listed as daylight and claim 6500 Kelvin which is pretty good for color temperature. In my discussion with my lighting professor from last semester he said anything above 5000 Kelvin should work for plants and the high CRI rating (Color Rating Index) will just make them look more green and pretty. Not that I doubt him but we'll experiment here and see. I've also got an LED setup and typical plant & aquarium bulbs at the school for a second setup there.

Once everything is setup we'll measure the different bulbs and post some results.

Monday, January 26, 2009

Here they come


Ok so I'm a bit late on this post, but somehow I didn't get in the way of the natural work of seed germination. We gots us some Basil & Tomato sproutin on up out of them pots. I need to get on the ball about lights.

I don't think I mentioned the white bases in the last post. The store didn't have the colored water trays for under the pots so I picked these up from them as the normal clay pot base (the orange colored ones) just roughed them up with some medium grit sandpaper and shot some primer on them evenly. Then came back with a white spray laquer I had left over from a few semesters ago. Once again, useful and cheap.

My watering can, which I have neglected to show so far, is just an old water bottle I saved and punched a bunch of holes in the lid with an ice pick, so far it seems to work great. I've been amazed at how quickly the soil dries up, I have been having to water these daily.

Wednesday, January 21, 2009

Getting Started

So this whole thing started with me moving from Texas to Michigan for grad school. If you didn't know it snows here and there isn't nearly as much sunshine. With my liking of the outdoors, cooking, and just being friendly of the plants I decided it was time to green up the apartment. In doing so I thought why not knock out two birds with one stone. I'd grow some vegetable plants. The second provoker of this experiment was a lighting project I conducted my first semester here.

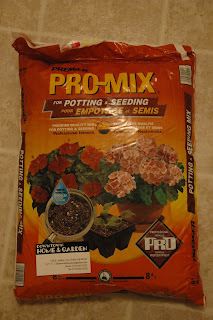
So to start this endeavor I bought some seeds (cilantro, sweet basil, and cherry tomatoes), soil, and pots. Start with the basics then we can get into the crazy stuff a little later (hydroponics, and LED's)
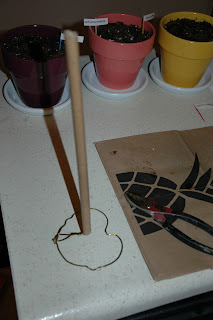
Here is the getup, some pretty pots (have to keep the apartment looking friendly) , seeds and trays for the water that drains through. We just can't have a mess, I track enough snow into the entry as it is. Not pictured are the seeds for the peppers. I kept some seeds from a heirloom pepper from the fall's farmers market. Along with some seeds from a green pepper I used for dinner tonight.

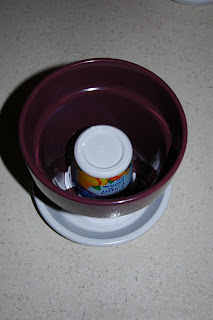
This is me trying to be clever. I didn't see the need for the potting soil to be all the way down into the bottom of the pot. Just one more reason for it to fall out the drain hole. Rocks I found were two things. Scarce since the ground is covered in a foot of snow, and second if you buy them, expensive. So with the reuse of a couple yogurt cups I cut some drainage slots and flipped them upside down to fill some space in the pot. So far so good. (I did make it about half this size for the tomato pot, thinking the roots are going to need more space and nutrients.)

The rest is pretty self expanitory. Insert cup, add soil, plant seeds, and let grow.


I did try for some clever points here. The seeds for the cherry tomatoes I figure are going to need some type of support once they get going. In preparing for this I used an old wire hanger and cardboard tube to make a vertical tie back to support the vine once it starts producing fruit.

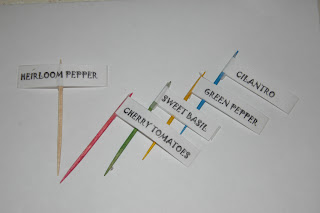
And the conclusion, you just can't grow a garden and not know what is where. In a budget attempt at something cleverly descent looking I made some labels on the computer. Printed them out and affixed them to colored toothpicks with scotch tape. Hopefully this will last, it's cheap and not limited to text.I don't know why it keeps rotating this image. It's the right direction on my computer.

Here you can see the finished labels.


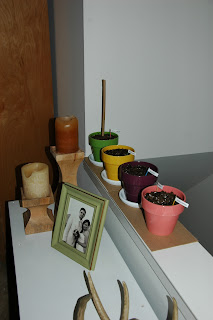
For now the beginnings are on the ledge next to the stairs.


So....time to shop for lights. Until next time..........